It is not a secret, that cooling is not X 1/9’s forte.
The concept itself, does not allow such a thing. We have a mid mounted engine and a front mounted radiator, with a long connection through covered, mostly metal pipes. As a result, the engine does not get much fresh air, while having the complete exhaust system closely below, does not help cooling either. (the spares image comes from the Danish based Niels Laursen source of X 1/9 spares that unfortunately closed down at the end of 2014)


All the above were known parameters the mechanics of the Gruppo had to work with, but being a modestly priced sports car, no expensive solutions were applied, apart from the alloy carter.
The first modification I did, was to make the water-cooling fan switchable from the cockpit, while I had a second original fan on hand, as the car had such a provision for 2 fans, one next to the other.
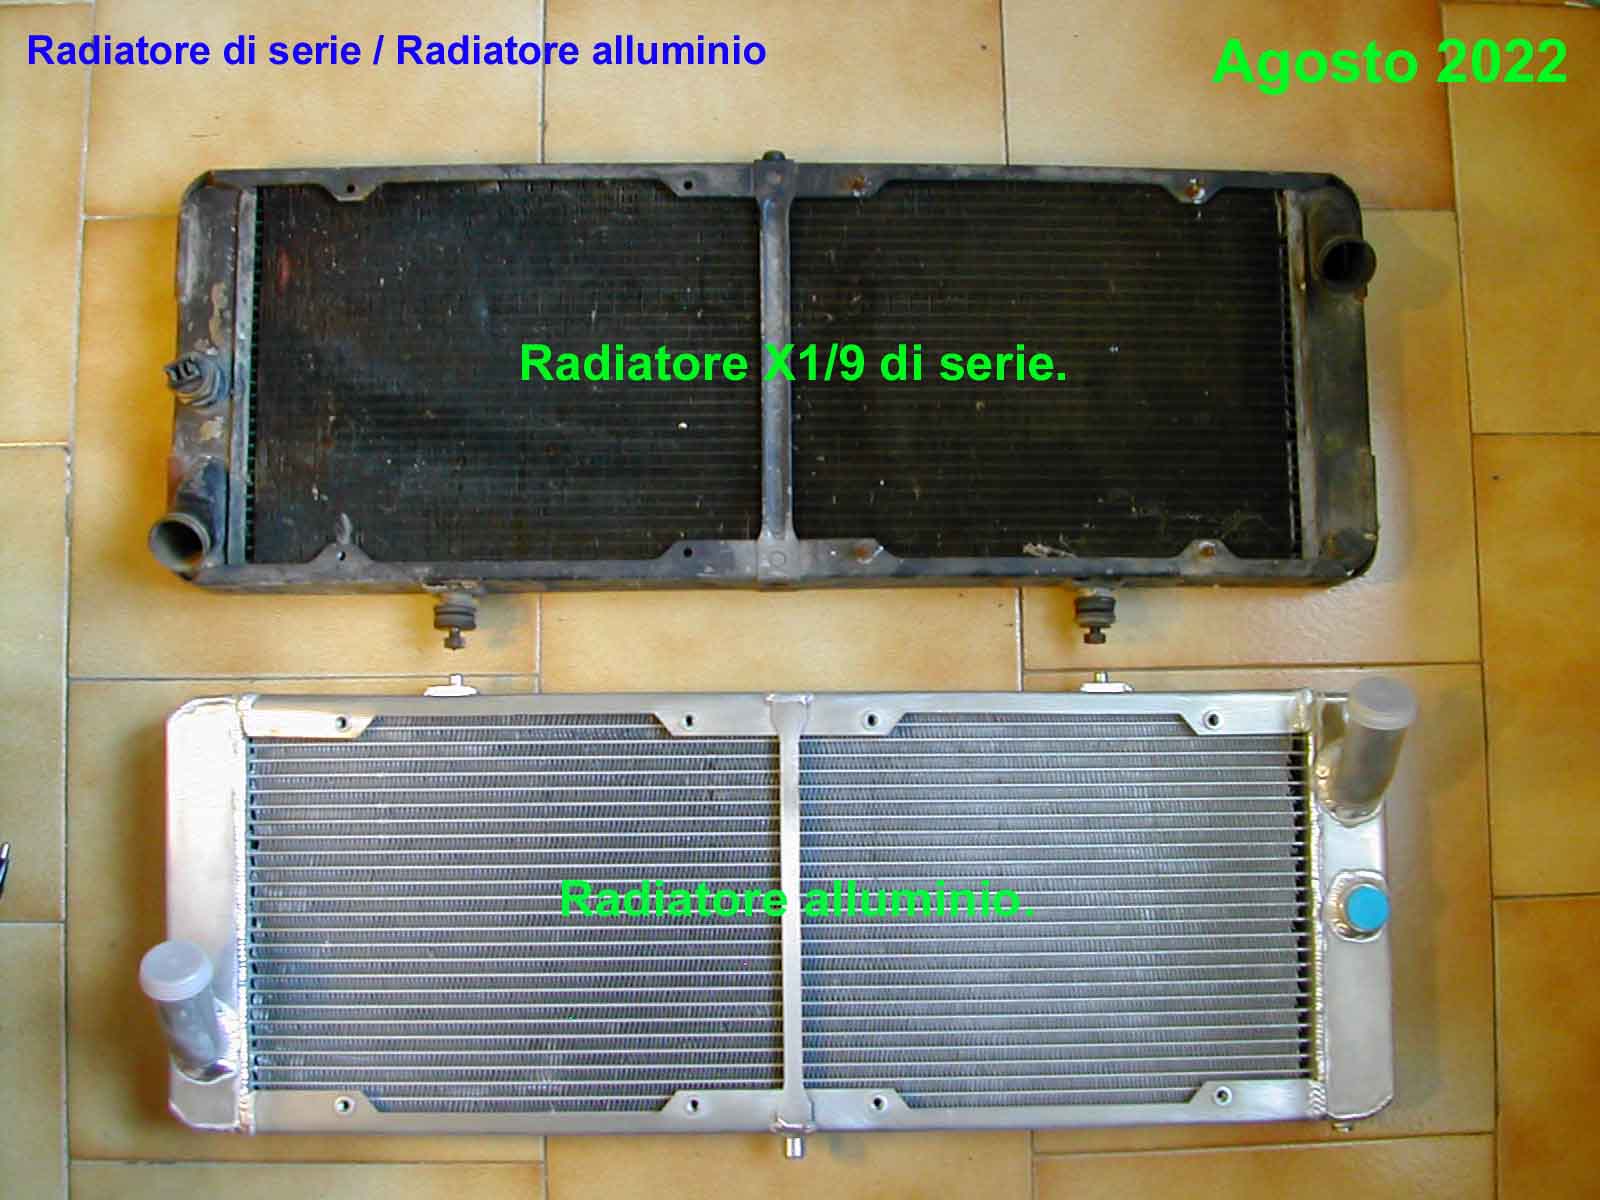
Back in 1979, I purchased a robust serviceable GT radiator kit from Stand21, which worked flawlessly for ~20 years, but then due to deterioration of the metal it started to leak a bit. 
When my mechanic Dionysis got fed-up trying to seal it, without telling me anything, he came up with a present, a new monoblock alloy oil cooler he fabricated himself, just for my X.
This, in addition to the modification my late friend mechanic Panos did in the ’90’s – changing the corroded water refrigerator with a bigger one, together with a stronger fan, helped me not to face any overheating problems.
But you know, I have one more friend insatiably fiddling with the inherent weaknesses of his cars. Danilo has the extra knowledge of electronics, and as such, he fine tunes everything much better. So when a little ago he told me he was working on the cooling system of his car, I could not resist asking him to share. Thanks Danilo & keep us updated on your project.
Dimitri,
Now, I am installing an auxiliary electrical cooling pump (on my X1/9 1500, for now) to eliminate, mainly, the “heat soak” (or “hot spots” or “hot soaking”) after ignition shutdown.
To replace completely the mechanical cooling pump with a electrical one, would require a different configuration of the cooling system, my opinion, of course.
Heat soak, after switching off the engine, leads, in my opinion, a faster burning of the head gasket and an equally faster formation of cracks in the head itself.
Currently and as aftermarket, it is easier to find electric cooling pumps.
Davies Craig, Australian manufacturer, has a catalog of electric water pumps with flows from 80 to 150 liters/minute. I bought one of 80 liters/minute: 208 Euros, from Italy, including Tax and postage.
As you said, the mechanical pump absorbs a substantial mechanical power, the electric pumps, instead, have a rather low electrical power.
I sensed that the motors designed for electric cooling pumps were different, I got confirmation from an interesting documentation of the Pierburg.
In the link Pierburg Pump Technology – TEAMLEARN
on page 8/61, you can see the very low water passage resistance for the engine designed for the electric pump respect to the engine with traditional mechanical pump.
That is why I chose to leave the mechanic pump and add the electric one.
I will mount the electric pump, at the front, at the exit of the radiator.
The increased passage resistance, due to the electric pump added, should not be too high.
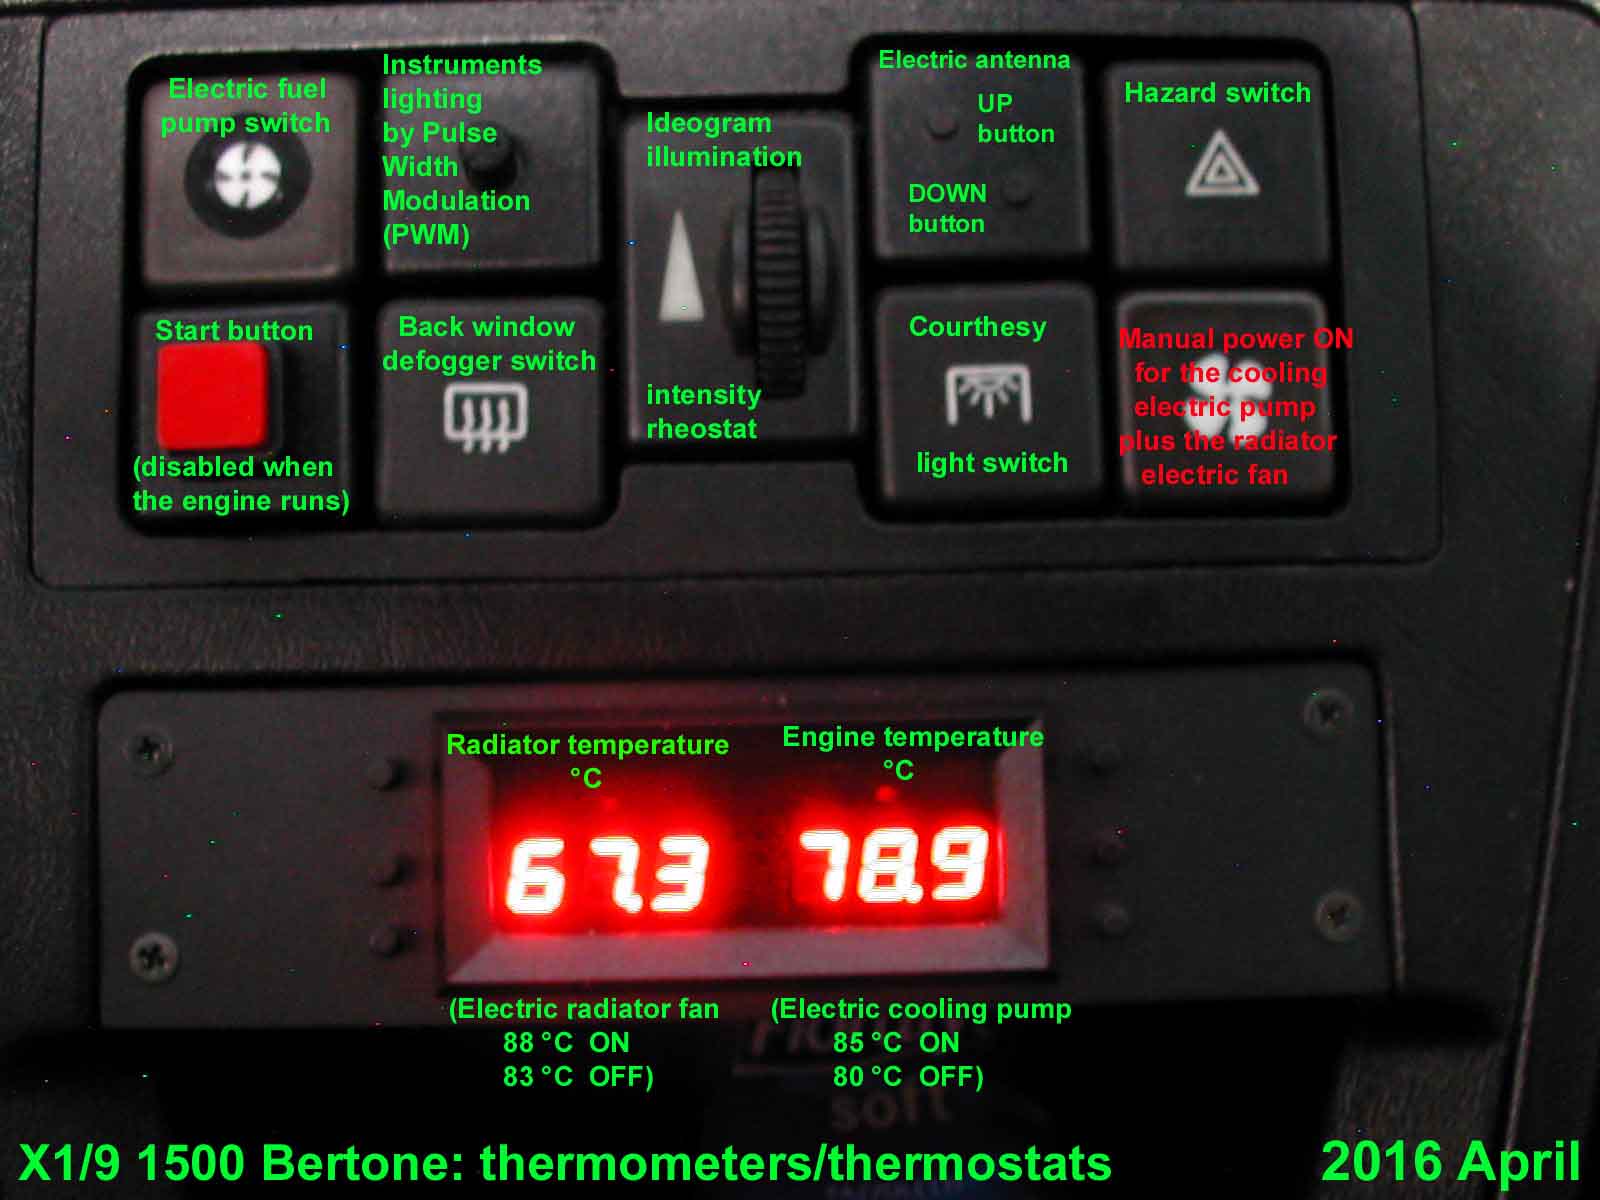
For the management of the electric water pump and radiator fan, I will make use of two
digital thermometers/thermostats.
I bought the electronic thermometers/thermostats from China, just over 3 euro each:
the quality is very good although it is a product from China. It was not worth to design,
from scratch, the electronic thermometer/thermostat.
Attached two pictures of the electronic circuit, still in progress, which I will insert
in place of the ashtray.

You can see the sensor (NTC), home-made, which will replace the original X1/9
sensor ON / OFF of the radiator fan.
The ON/OFF sensor of the thermostat box (that sensor exist on the X1/9 1500 Bertone,
but not in use, maybe for air conditioning?) will be replaced by a NTC sensor, home-made, for the management of the electric pump.
The micro-switches, on the front panel, set temperature of intervention and hysteresis.
The circuit of the electric pump and the radiator fan will stay ON 4 minutes after the engine is switched OFF.
Of course, electric pump and radiator fan will only be switched ON if temperature exceed the set temperature, also in normal operation.
Keep in mind that the project is not yet completed.

Photo 114 shows some details of the front panel, already present in the photo of my previous message.
The 3 digit display of the two XH-W1209 thermometer/thermostat were removed and re-soldered on the multi holes board.
Also other functions (micro-switches and LEDs) have been moved on the multi holes board (single layer).
 In Photo 115 some constructive details of the themperature sensor regarding the electrical cooling pump.
The whole device is …”home made”… as well as most of the rest….
The original themperature sensor of the XH-W1209 was too bulky so I replaced it with a much smaller NTC Murata
(same electrical caracteristics).
One day later UPDATE
Two more photos
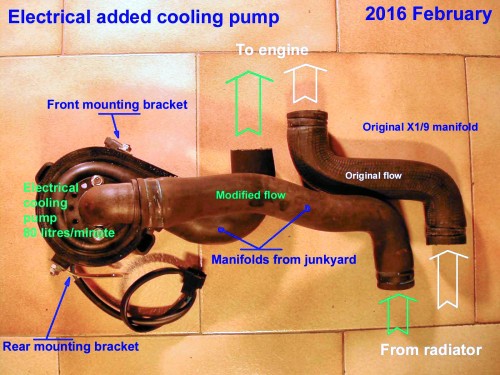
The first photo shows the original flow and the modified flow for the coolant.

This second one, is a bottom view of the arrangement of the electric cooling pump. (unmounted the fixing clamps sleeves as also the device for bleed air trapped in the pump).
…..probably (my opinion) the project is too specific so that it can be useful to someone….
Danilo.
APRIL 15, UPDATE
Danilo’s project has been completed and the resulting cooling improvement and the the extra security manual activation give him an enviable X1/9 upgraded cooling system. Thanks Danilo for sharing!
Ciao Dimitris,
I finally completed the electronic management of electric radiator fan and electric cooling pump. Now the temperatures are measured and controlled much better then before.
For additional security, a special switch can manually turn on electric radiator fan & electric cooling pump.
The attached photo shows the two mounted thermometers/thermostats on the X1/9 Bertone 1500. You can also see the switch panel to witch I added other functions besides the standard ones.
Tanti saluti da Trieste.
Read Full Post »